Are your floors always cold, no matter how high you turn up the heat? The problem might be right under your feet. An uninsulated or poorly insulated crawl space doesn’t just make your home uncomfortable; it can also drive up your energy bills. Worse yet, a damp crawl space can become a breeding ground for mold and mildew if the insulation isn’t installed correctly. Learning how to properly insulate your crawl space is one of the best ways to protect your home’s comfort, air quality, and your wallet.
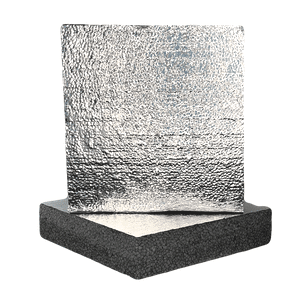
To help prevent moisture and mold growth, our team recommends installing a vapor barrier along with the proper insulation to create a comfortable environment with you and your family known as R-10 Styrofoam Panels.
Why Insulating Your Crawl Space is a Smart Move
Thinking about what’s happening in your crawl space probably isn’t at the top of your to-do list, but giving it some attention can make a huge difference for your entire home. That dark, unused space under your house has a bigger impact on your daily life than you might realize. Proper insulation isn’t just about staying warm; it’s about creating a healthier, more stable, and more efficient home from the ground up. It helps manage moisture, improves the air you breathe, and can even put a little money back in your pocket through energy savings. It’s one of those home improvement projects that works quietly in the background, providing benefits you’ll feel all year round.
Protect Your Home from Moisture Damage
Moisture is the number one enemy of a healthy crawl space. When damp soil is exposed, that moisture evaporates and rises, getting trapped in the space below your floors. This can lead to wood rot, mold growth, and pest infestations—all things no homeowner wants to deal with. The first and most important line of defense is a durable vapor barrier laid across the ground to stop moisture from the soil from ever entering the space. Pairing this with the right insulation on the walls creates a sealed environment that protects your home’s structural integrity and prevents costly moisture-related repairs down the road.
Improve Your Home’s Air Quality
Did you know that a good portion of the air you breathe inside your home actually comes up from your crawl space? It’s called the “stack effect.” As warm air rises in your home, it creates a vacuum that pulls air up from the lowest levels. If your crawl space is damp, moldy, or filled with dust, those allergens and contaminants are pulled right into your living areas. Insulating and sealing the crawl space helps create a clean, dry buffer zone. This means the air circulating through your home is healthier for you and your family, which is especially important for anyone with allergies or asthma.
Increase Energy Efficiency
If you’re tired of chilly floors in the winter and high energy bills, your uninsulated crawl space is likely a major culprit. An unconditioned crawl space allows cold air to seep in and rob your home of heat, forcing your HVAC system to work overtime just to keep you comfortable. Proper insulation acts like a cozy blanket for your home, preventing heat loss and keeping temperatures more consistent. This not only eliminates those cold spots on your floors but also reduces the strain on your heating and cooling systems, leading to noticeable savings on your monthly energy bills.
Two Main Ways to Insulate a Crawl Space
When it comes to insulating your crawl space, there are two primary approaches you can take. The right choice really depends on whether your crawl space is vented or unvented and what you have stored down there, like ductwork or plumbing. One method focuses on insulating the “ceiling” of the crawl space, which is the floor of your home. The other, more modern approach involves sealing the entire space and insulating the foundation walls. Understanding the difference between these two methods will help you decide which path is best for protecting your home and making it more comfortable.
Insulating the Crawl Space Ceiling
Insulating the ceiling of the crawl space, or the underside of your home’s subfloor, is a more traditional method. This approach is generally considered if your crawl space is vented and contains no ductwork, pipes, or other mechanical equipment. The goal here is to stop cold air in the crawl space from affecting the floors above. However, this method can leave pipes vulnerable to freezing in the winter and doesn’t address moisture issues coming from the ground or walls. It essentially treats the crawl space as an outdoor space, separating it from the living area above.
Insulating the Foundation Walls
Most building science experts now recommend sealing the crawl space vents and insulating the foundation walls instead. This method, often part of a full crawl space encapsulation, turns the crawl space into a clean, dry, and conditioned part of your home. By insulating the walls, you protect the entire space—including any ductwork and plumbing—from outside temperature swings. This is a far more effective way to prevent moisture problems, improve air quality, and maximize energy efficiency. It’s a comprehensive solution that addresses the crawl space as a whole system, which is why it’s the preferred method for a complete crawl space repair.
Choosing the Right Insulation Material
Once you’ve decided on an insulation strategy, the next step is picking the right material for the job. Not all insulation is created equal, especially when it comes to the unique environment of a crawl space. Because this area is prone to moisture and humidity, you need a material that can handle damp conditions without losing its effectiveness or becoming a breeding ground for mold. The wrong choice can actually make problems worse, trapping moisture against your home’s wooden structures. Let’s look at a few common options and see how they stack up for use below your home.
Fiberglass Batts
Fiberglass batt insulation is what many people picture when they think of insulation. While it’s common in walls and attics, it’s a poor choice for crawl spaces. Fiberglass batts are like a sponge; they absorb and hold onto moisture, which makes them heavy and causes them to sag and fall. Once wet, they lose their insulating properties and can become a breeding ground for mold and mildew. Installing them overhead in a damp crawl space is a recipe for failure, as they often end up as a soggy mess on the ground within a few years.
Spray Foam Insulation
Spray foam insulation is a great option for sealing air leaks, especially around the rim joists where the foundation meets the frame of your house. It expands to fill every crack and crevice, creating an airtight seal that other materials can’t match. There are two types: open-cell and closed-cell. Closed-cell spray foam is the better choice for crawl spaces because it’s waterproof and acts as a vapor barrier. While it’s highly effective, it can be a more expensive option and requires professional installation to be applied correctly and safely.
Rigid Foam Boards
Rigid foam boards are an excellent, long-lasting solution for crawl space walls. These boards are made from materials like polystyrene that are completely waterproof and won’t support mold growth. They are durable, easy to install against the foundation walls, and provide a continuous thermal barrier. Because they don’t absorb water, they maintain their insulating value even in damp environments. This makes them a key component of a professional crawl space waterproofing system and the ideal choice for creating a dry and energy-efficient space under your home.
Vapor Barrier
Vapor Barriers are known to prevent mold and foul-smelling crawl spaces. Homeowners should not be living in these conditions as they can affect their health and attract unwanted rodents/pests.
A vapor barrier can help keep out this unwanted moisture that creates an unbearable living situation for the homeowner during the winter months. It can lower the cost of your heating and cooling bill.
Why a Vapor Barrier is Non-Negotiable
It’s easy to think that if you don’t see standing water, your crawl space is dry. But the biggest moisture culprit is often invisible. The dirt floor under your home is constantly releasing water vapor into the air, even when it feels completely dry. This moisture gets trapped in the crawl space, creating a damp, humid environment that’s perfect for mold growth, wood rot, and those musty smells that can creep into your living areas. A thick, durable vapor barrier is the most important step to stop this cycle. It acts as a shield, completely separating your home’s structure from the damp earth below and protecting both your air quality and your home’s foundation.
Installing a Vapor Barrier Correctly
Simply laying a sheet of plastic on the ground isn’t enough to get the job done. For a vapor barrier to be truly effective, the installation has to be just right. The process involves covering the entire dirt floor with a heavy-duty liner, making sure to overlap and seal every seam so no vapor can escape. The barrier should also run up the foundation walls and be securely fastened to create a completely sealed space. This method is a key part of a full encapsulation system, which is the foundation for effective crawl space waterproofing. When done correctly, it transforms a damp, dirty space into a clean and dry area that helps protect your entire home.
Star Guard
Our team can provide homeowners with an excellent solution to help seal their crawl space. Star Guard can provide a couple of benefits for homeowners when installing Star Guard within their homes.
- Sealing off walls within the crawl space
- Saving money on energy bills
Having your crawl space insulated can help prevent several issues such as:
- Mold
- Rot
- Moisture
- Musty Odors
- Air leaks
Our team not only prevents your pipe from bursting, but we insulate the whole crawl space to increase the comfort for you and your family! Schedule a free inspection today, and let us help you save money on energy and increase the comfort within your home!
Vesta Foundation Solutions is an award-winning Oklahoma City foundation repair contractor and crawl space waterproofing specialist founded in 2017. We repair over 40 homes a week ranging from concrete repair to dirt crawl space solutions. We service all of Oklahoma such as: Tulsa, Yukon, El Reno Edmond.
When it comes to the long-lasting stability of your home, it is crucial to have an experienced professional to call. Vesta is a company that understands the best practices that will help restore and protect your home’s structural integrity. We provide free, no-obligation estimates in crawl space repair, foundation repair, concrete lift and leveling, and basement waterproofing.
What Does Insulation R-Value Mean?
When you start looking at insulation, you’ll see the term “R-value” everywhere. Think of it as a simple grade for how well the insulation works. The “R” stands for resistance, and the R-value tells you how well the material resists the flow of heat. According to ENERGY STAR, a higher R-value means the insulation provides better thermal performance. For your home, this translates directly into more consistent indoor temperatures and lower energy bills. In Arkansas, having the right R-value in your crawl space is key to keeping your floors from getting frigid in the winter and stopping the summer humidity from creeping into your home. It’s not just about comfort; it’s about making your home more efficient and saving money year-round.
A Step-by-Step Guide to Insulating Your Crawl Space
Insulating a crawl space can feel like a big project, but breaking it down into steps makes it much more manageable. The goal is to transform it from a damp, drafty area into a clean, dry space that’s part of your home’s conditioned envelope. The process involves more than just adding insulation; it starts with controlling moisture, which is the root of most crawl space problems. You’ll need to dry out the area, seal it off from outside air and ground moisture, and then install the right kind of insulation. While some parts of this can be a weekend DIY project, tackling serious water issues often requires a professional touch to ensure it’s done right the first time.
Step 1: Start with a Dry Space
Before you even think about insulation, your crawl space must be completely dry. Adding insulation to a damp environment is a recipe for disaster, as it can trap moisture against your home’s wooden structures, leading to mold, rot, and other foundation problems. Water can get in from plumbing leaks, groundwater seepage, or poor exterior drainage. If you notice standing water, damp soil, or condensation, you have to address the source of the water first. For persistent moisture issues that go beyond simple fixes, it’s wise to bring in experts who specialize in crawl space waterproofing to create a permanently dry foundation for your insulation project.
Fixing Water Leaks and Drainage First
Your first line of defense against crawl space moisture is managing the water around your home’s exterior. Start by checking your gutters to make sure they are clean and functioning properly. It’s also crucial that your downspouts direct water several feet away from your foundation. If water is pooling near your house after it rains, you may need to re-grade the soil to create a gentle slope away from the walls. Addressing these external drainage issues can solve many crawl space water problems and is an essential first step before sealing and insulating the space below your home.
Step 2: Seal All Vents and Air Leaks
For years, people thought crawl space vents helped air out moisture, but we now know they often do the opposite. In the summer, they let in warm, humid Arkansas air, which leads to condensation. In the winter, they let in cold air that freezes your pipes and makes your floors cold. The modern approach is to seal off all crawl space vents and any other air leaks, like cracks in the foundation or gaps around pipes. This helps stop the uncontrolled flow of outside air, making it easier to manage the temperature and humidity levels in the crawl space and, by extension, the rest of your home.
Step 3: Lay Down a Durable Vapor Barrier
The ground itself is a major source of moisture in a crawl space. To stop this, you need to lay down a thick, durable plastic sheet known as a vapor barrier. This barrier covers the entire dirt floor, effectively separating your house from the damp earth below. A high-quality vapor barrier is puncture-resistant and should be properly sealed at all seams and run up the foundation walls a short distance. This single step can dramatically reduce the humidity level in your crawl space, preventing musty odors and mold growth while protecting the structural integrity of your floor joists and beams.
Step 4: Install Your Chosen Insulation
Once the crawl space is dry and sealed, it’s time to insulate. The best practice is to insulate the crawl space walls rather than the ceiling (the underside of your floor). By insulating the walls with a water-resistant material like rigid foam board, you bring the crawl space into your home’s thermal envelope. This method helps protect your pipes from freezing, reduces drafts, and makes the floors above much warmer and more comfortable. It’s a key component of turning the crawl space into a semi-conditioned area that contributes to your home’s overall energy efficiency instead of detracting from it.
The Ultimate Solution: Crawl Space Encapsulation
If you’re looking for the most effective, long-term fix for your crawl space, the answer is full encapsulation. This process combines all the steps we’ve discussed into one comprehensive system. Encapsulation involves completely sealing the crawl space from the outside environment by covering the floor and walls with a heavy-duty vapor barrier, sealing all vents and air leaks, and insulating the foundation walls. This transforms the crawl space from a damp, dirty, and problematic area into a clean, dry, and healthy part of your home. A professional crawl space repair contractor can ensure the encapsulation is done correctly, creating a space that protects your home’s structure and improves its air quality.
How Encapsulation Creates a Clean, Conditioned Space
A properly encapsulated crawl space offers benefits that extend throughout your entire home. By stopping moisture and unconditioned air at the source, you eliminate the musty smells that can often rise into your living areas. The air in your home becomes healthier because you’re no longer breathing in mold spores and dust mites from below. Encapsulation also leads to significant energy savings by reducing drafts and helping your HVAC system work more efficiently. Your floors will feel warmer in the winter, and you’ll have a clean, usable space for storage, all while protecting your home’s foundation from moisture-related damage.
Controlling Humidity with a Dehumidifier
Even with a fully sealed and encapsulated crawl space, it’s important to control the relative humidity to prevent any chance of mold growth. The final step in creating a truly conditioned space is often the installation of a high-efficiency crawl space dehumidifier. These units are designed to operate in the cooler environment of a crawl space and should be set to keep the humidity below 60%. Look for a self-draining model that can be connected to a sump pump or drainage line, so you don’t have to worry about emptying a water basin. This ensures the air in your crawl space stays dry and healthy year-round, providing the ultimate protection for your home.
Essential Tools and Safety Gear for DIY Insulation
If you decide to tackle parts of your crawl space insulation project yourself, having the right tools and safety gear is non-negotiable. Crawl spaces can be tight, dark, and potentially hazardous places, so preparation is key to getting the job done safely and effectively. Before you start, gather everything you’ll need so you don’t have to make multiple trips in and out of the space. Being well-equipped will not only protect you from potential injuries but also help you achieve a more professional and long-lasting result. Remember, for larger issues like standing water or significant sealing, calling a professional is always the safest bet.
Safety First: Protecting Yourself in the Crawl Space
Your safety should always be your top priority when working in a crawl space. At a minimum, you should always wear gloves, eye protection, and a dust mask or respirator to protect yourself from dust, debris, and potential mold spores. It’s also a good idea to wear durable, long-sleeved clothing and a bump cap or hard hat to protect your head. Before entering, be aware of potential hazards like hanging wires, sharp objects, or signs of pests. Always work with adequate lighting, like a powerful headlamp or portable work lights, and let someone know you’ll be working under the house.
Tools for the Job
Having the right tools on hand will make the insulation process go much smoother. For a typical DIY project, you’ll need a basic set of tools to measure, cut, and secure materials. A good utility knife with plenty of extra blades is essential for cutting insulation and the vapor barrier. You’ll also need a quality tape measure, a caulk gun for sealing air leaks, and heavy-duty construction tape for sealing the seams of the vapor barrier. Depending on the type of insulation you choose, you might also need a staple gun. A good pair of knee pads will also save you a lot of discomfort while you work.
Frequently Asked Questions
Why is the common pink fiberglass insulation a bad choice for my crawl space? While fiberglass insulation works well in attics and walls, it’s not suited for the damp environment of a crawl space. Think of it like a sponge; it absorbs moisture from the air and ground, causing it to get heavy, sag, and fall. Once it’s wet, it loses its insulating ability and can become a breeding ground for mold, which is the last thing you want right underneath your home’s floors.
My crawl space has vents. Shouldn’t I keep them open for airflow? That’s a common thought, but building science has shown that vents often cause more harm than good. In humid Arkansas summers, they let in warm, moist air that creates condensation and raises humidity. In the winter, they let in frigid air that makes your floors cold and can put your pipes at risk of freezing. Sealing the vents is a key step in creating a controlled, semi-conditioned space that actually protects your home.
What’s the real difference between just insulating and getting a full encapsulation? Adding insulation is just one step, but encapsulation is a complete system. Encapsulation involves sealing off all outside air leaks and vents, laying a heavy-duty vapor barrier across the entire floor and up the walls, and then installing the proper waterproof insulation. It’s a comprehensive solution that tackles moisture, air quality, and temperature control all at once, turning your crawl space into a clean and dry part of your home.
Do I really need a vapor barrier if the ground in my crawl space seems dry? Yes, absolutely. Even when the dirt floor feels dry to the touch, it is constantly releasing water vapor into the air. This invisible moisture is the main source of the high humidity that leads to musty smells, mold growth, and wood rot. A professionally installed vapor barrier is the only way to completely stop this moisture from entering your crawl space and affecting the rest of your home.
How can I tell if my current crawl space insulation needs to be replaced? A few telltale signs can let you know your insulation isn’t doing its job. If your floors are noticeably cold in the winter or you have surprisingly high energy bills, that’s a big clue. You might also notice a persistent musty smell in your home that you can’t seem to get rid of. If you take a look in the crawl space and see insulation that is sagging, stained, or damp, it’s a clear sign that it has failed and needs to be addressed.
Key Takeaways
- Prioritize a Dry Space: Before adding any insulation, you have to stop moisture at its source. This involves fixing leaks, managing outdoor drainage, and installing a quality vapor barrier to keep your crawl space dry and healthy.
- Seal and Insulate the Foundation Walls: The most effective modern approach is to seal the vents and insulate the crawl space walls, not the ceiling. This strategy turns the entire space into a conditioned buffer zone, protecting your pipes and making your floors noticeably warmer.
- Consider Full Encapsulation for a Permanent Fix: For the best long-term results, a complete encapsulation system is the answer. It combines a vapor barrier, wall insulation, and a dehumidifier to create a clean, dry space that improves your home’s air quality and energy efficiency.